
by Kathryn Brenne


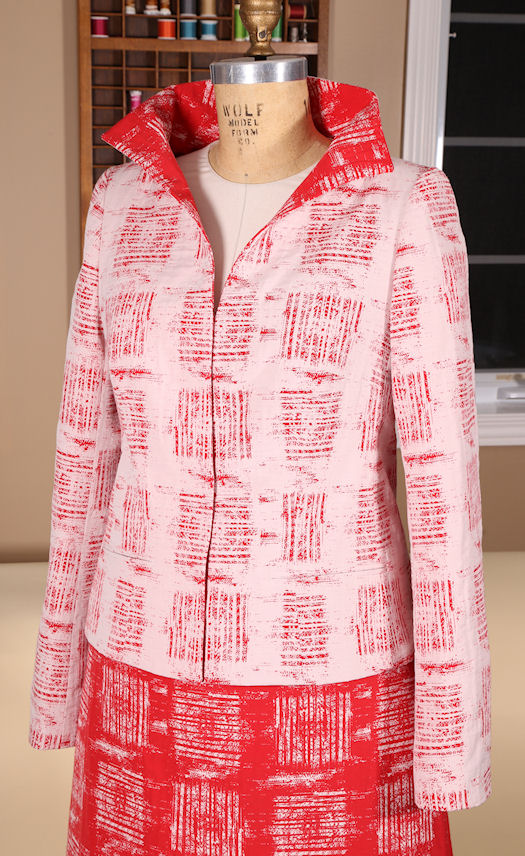
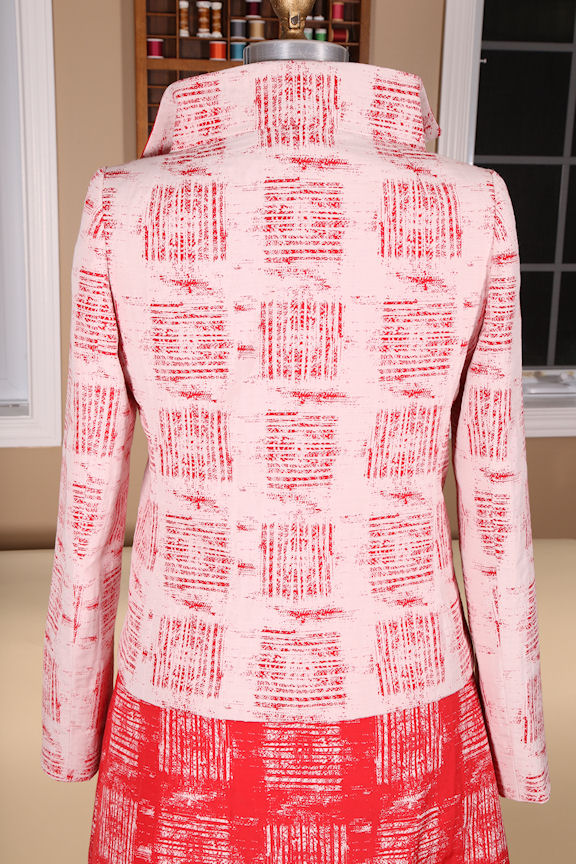
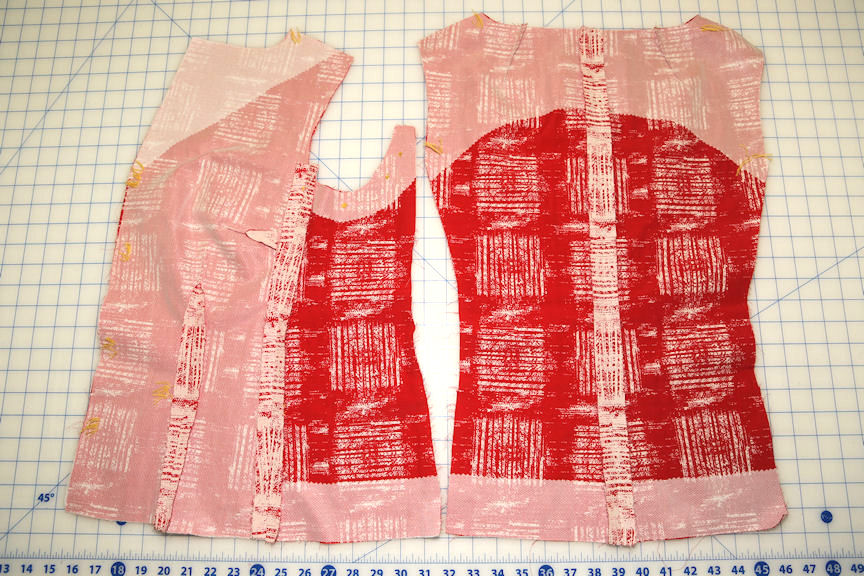
Many brocade fabrics have a design that will require matching. Drape a length of fabric over a dress stand, step back and see if you notice a predominant pattern or repeat. For my jacket, the square design required matching. I also had to consider where to place the squares to avoid a bullseye effect over the bust area. Try draping the fabric across your body to determine the best design placement. To match the design, use the tips outlined here:.
Make sure to use a nap layout, cutting all pattern pieces in the same direction. When a garment requires matching, cut the body first and wait until it is constructed before cutting the sleeves. For my sample jacket and skirt, I finished the jacket first so that I could try it on with a muslin sample of the skirt in order to mark the continuation of the fabric design onto the skirt when the jacket was worn. kbbr_dkb56798_1
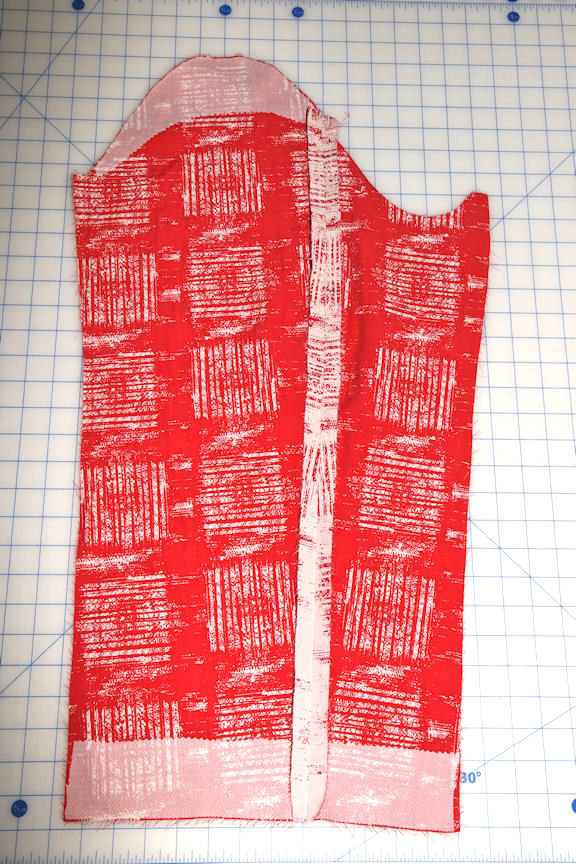
Traditional marking techniques using chalk or tracing paper will not show up on these fabrics. Instead use tailor's tacks or thread tracing. Mark the notches with a double strand of basting thread, taking several small running stitches into the seam allowance. Darts, pocket placements and hem allowances can also be thread-traced. I like to thread trace the armsyce of a jacket, making the sleeve easier to insert.
The type of interfacing you select for your project will depend upon the fabric's heat tolerance. Always test a sample first. If your fabric will tolerate heat, try using an all bias knit fusible interfacing for light to medium support. For more stiffness a fusible weft insertion interfacing will work well. For fabrics that do not tolerate heat, a sew in light weight hair canvas is suitable.
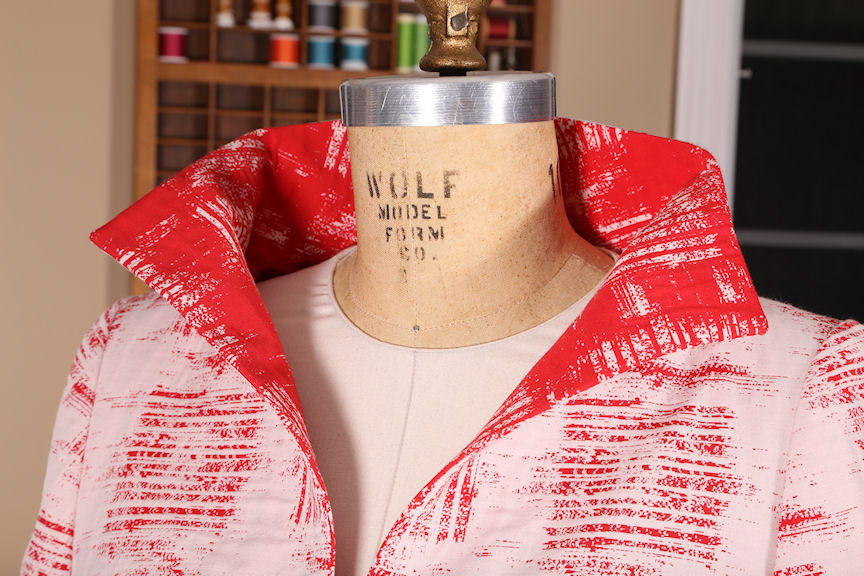
Fusible interfacings can be layered to give the desired effect. For my jacket, the lapel needed extra support in order to stand up and away from the neckline. I fused two layers of all bias knit interfacing one on top of the other to create the stiffness I needed.
In areas where the edge of the interfacing sits into the body of the garment, pink the edge to soften it and prevent a ridge from showing through.
Areas that need interfacing are jacket fronts, the upper back, armsyce, sleeve cap, hems, collars, waistbands or yokes. I do not usually interface side panels in jackets, which allows for a softer silhouette. The interfacing in the upper back of a jacket adds support, while in the sleeve cap it helps to prevent a difficult fabric from rippling once the sleeve is sewn in. Interfacing in the hems prevents them from stretching and gives the hem a soft roll. Used around the armsyce it prevents the fabric from stretching when inserting a sleeve.
Applying interfacing
Sleeve interfacing
It's easy to create your interfacing pieces using your garment pattern pieces as a guide. Use the back pattern to create a pattern for the back interfacing, which curves over the middle of the shoulder blades. To create a pattern for the armsyce interfacing, which should be 1 1/2" wide,cut the interfacing with the same grain line as the fabric. For the hem allowances cut crosswise strips of interfacing the width of the hem allowance plus 1/2", and for sew-in interfacings cut the hem interfacings on the bias. kbbr_dkb56740_1 kbbr_dkb56745_1