
by Kathryn Brenne


A leather pillow is a perfect introduction to working with leather. It is an easy, quick project with very little chance of error. We'll go over some general guidelines, and then I'll show you how I created my pillow.
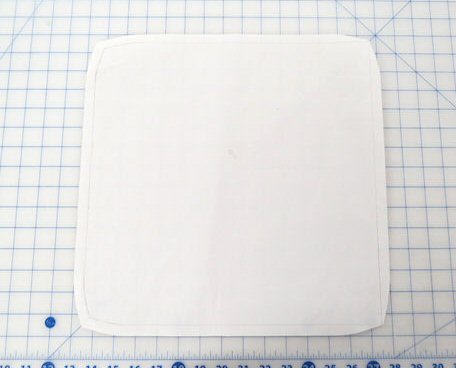
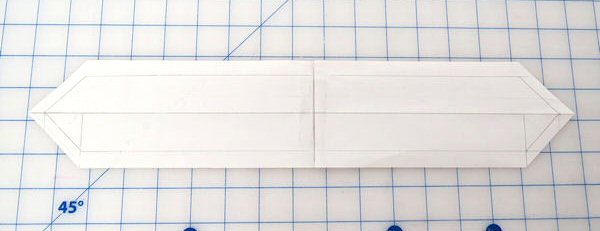
Pillow back pattern showing how the corners of the pillow are tapered down 3/8" beginning 2-3" away from each corner, depending on the size of the pillow.
Choose an appropriate sized pillow form. Draft a pattern to cover the form and add a 1/2" seam allowance. The pattern should be the same dimensions as the pillow form. To prevent the corners from drooping down, taper in each corner by 3/8" starting about 3" away from each corner, depending upon the size of your pillow. Once completed the corners will still look square.
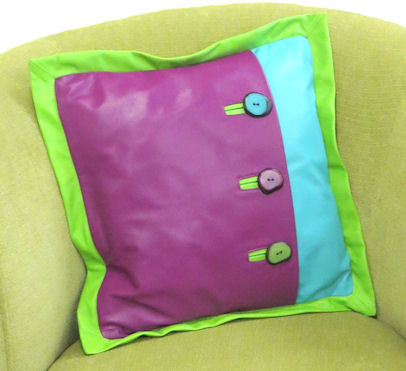
To make better use of the leather or to combine different colors, consider dividing the front of the pillow into smaller sections. (I divided the front of my pillow into pieces that ended up being one quarter and three quarters of the total front measurement.) For instance, you could divide the front into two halves or four checkerboard-like squares.
Plan to add a button closure or invisible zipper so that you can insert the pillow form. An invisible zipper is sewn into leather using the same technique that you would use for fabric. You do not need a Teflon invisible zipper foot as the foot is sewn on the zipper tape and not leather. Refer to the 'Ponte Perfection' tutorial for tips on inserting an invisible zipper.
For my pillow, I used one lambskin each of orchid, aqua and lime green leather for a total of 29 square feet. There is enough leather leftover to do another small pillow.
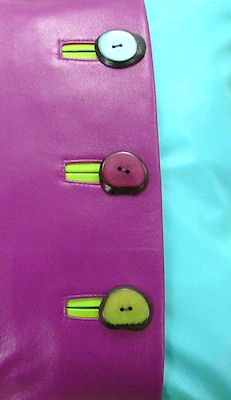
The pillow pattern had to fit a 14" pillow form. I drafted a 4 1/2" folded back facing on the orchid section, which allowed for the 1 1/2" tagua nut buttons and buttonholes. There is a 3" extension on the aqua piece from where the button is sewn to a folded edge. I added a 4" facing, which folds back from the edge of the aqua piece. This gave me a double layer of leather to sew the buttons to. The back is drafted as a 14" inch square.
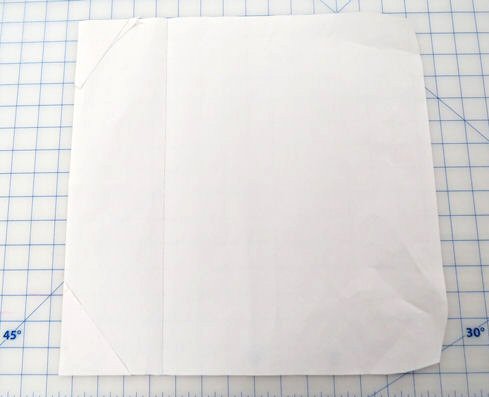
Pillow front overlay, which will have buttonholes sewn into it
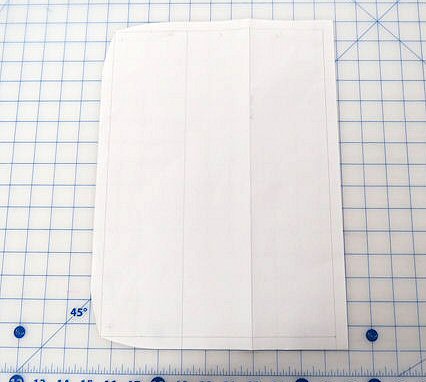
Pillow front underlay, which will have buttons sewn into it
Pillow flange pattern
I added a flange to the outside of my pillow to bring in a third color. To draft the flange, draw a pattern piece that is the length of one pillow edge by 1 1/8" wide (or your desired finished width), and then draw a 45º angle from each end of the pattern outward. Add a 1/4" seam allowance to the corner seam and a 1/2" seam allowance to the shorter inside long edge.
Since the flange around the outside of the pillow has a folded outer edge, fold this pattern piece along the outer edge to cut out a full pattern piece. Cut 4 flanges, one for each side of the pillow.
Close up
To assemble the pillow first make the bound buttonholes. Fold back the overlay facing to finish the back of the buttonholes. Fold back the underlay facing and sew on the buttons.
Button the two front pieces together. Baste the top and bottom edges of the underlay and overlay together within the seam allowance. Check to make sure that the finished pillow front has the same measurement as the pillow back.

Prepared pillow flange. Leave 1/2" unsewn on the inside edge
Sew the corners of the flange together using a 1/4" seam allowance. Start and stop sewing 1/2" in from each end. Clip a V into the inner corner of the seam, press the seam open and turn the flange right side out.
Machine baste the flange to the pillow back using a 3/8" seam allowance. Sew each side separately. The 1/2" that was not sewn at the edge of the flange corner makes it easy to work the flange around the corner.
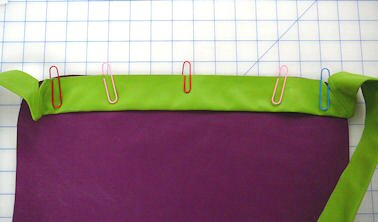
Baste the flange to the pillow using clips to hold the edges together. Sew one edge at a time.
Use clips to "pin" the pillow back to the front, right sides together, with the flange sandwiched in between. With the buttons undone, sew all layers together with a 1/2" seam allowance. Turn right side out through the front opening. Press the outer edge of the flange flat. Insert pillow form and button the pillow closed.
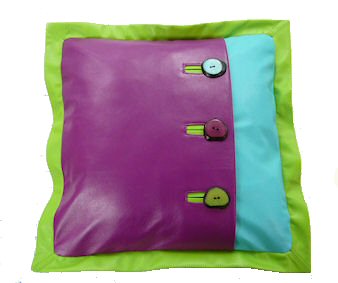
Voila... Finished pillow!!