
by Kathryn Brenne


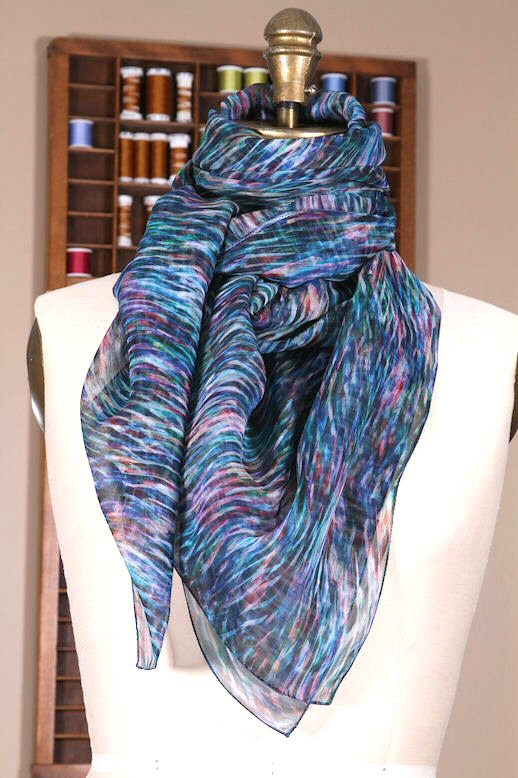
Finished scarf (more views in last section)
A beautiful printed silk makes an easy scarf or shawl. With all of the skills mentioned in this tutorial whipping up a scarf will be a breeze!
To make a square shawl, which can be folded diagonally and rolled and worn as a scarf, purchase enough fabric so that the length equals the width of the fabric. To make a rectangular shaped scarf purchase enough fabric to equal the length of the scarf. The width can be cut to any size that works for you. You may end up with a few rectangular scarves from one length of fabric.
Pull a thread to straighten the two cut ends of the fabric.
Spray starch the edges of the fabric.
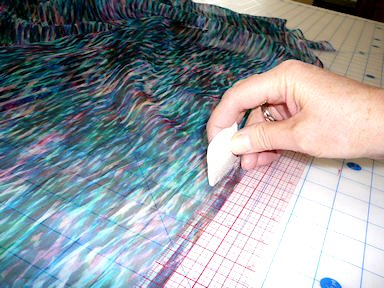
Using wax chalk to mark a line 1/2" in from cut edge
Chalk a line 1/2" in from all edges of the fabric. I don't usually like to use a wax chalker as it can stain but in this case the wax chalker showed up best. Test first to make sure that the wax does not leave a permanent stain on the fabric. Powdered chalk disappeared into the fabric and was difficult to see.
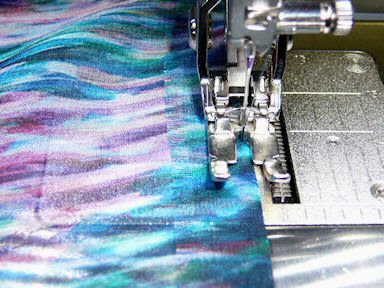
quarter inch foot with needle one stop to the left, edge-stitch close to fold
Press the marked 1/2" under towards the wrong side of the fabric.
Using a 1/4" foot, straight stitch throat plate and the needle one position to the left (turn the hand wheel to make sure that the needle does not hit the foot or the edge of the straight stitch throat plate) stitch close to the edge of the fold.
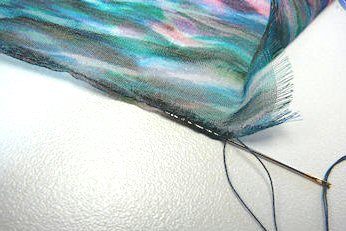
Leave long thread tails to knot and thread into fold
Instead of back stitching, leave long thread tails at the beginning and end, knot them and feed the thread tails into the folded edge of the fabric.
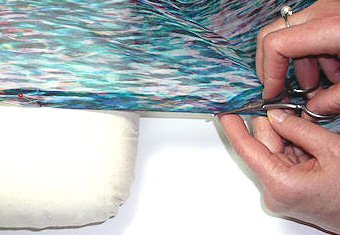
Pin scarf to tailor's ham or ironing board to provide tension and trim close to stitching
Using a small pair of blunt tipped or duck billed applique scissors trim the seam allowance close to the first row of stitching. This is much easier to do if there is some tension on the fabric, so before you start, pin the fabric to a tailor's ham or the end of your ironing board.

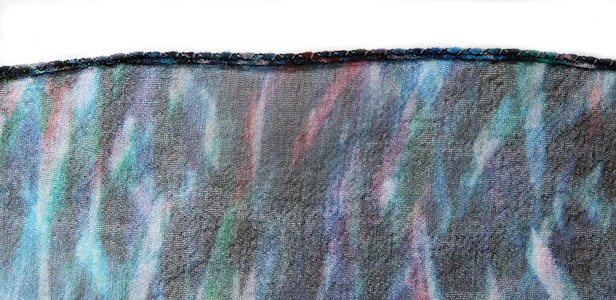
Edge stitching foot and regular needle plate to zig zag over cut edge. Thread a waste yarn through the corner.
Using an edge stitching foot with the needle positioned 2 stops to the left, a stitch length of 2mm and a stitch width of 2.5mm, zig zag over the edge. The zig zag should be wide enough to cover the raw cut edge. It will form a small picot edge. Loop a waste thread through each corner. As you stitch closer to the corner you can pull on the thread to provide some tension. Remove the waste thread once the stitching is complete. Work each side separately, working in a counter clockwise direction. Again, leave long thread tails, which can be used to neaten up the corner, knotted off and hidden in the stitching.
Close up view of picot edge created
with a zig zag stitch
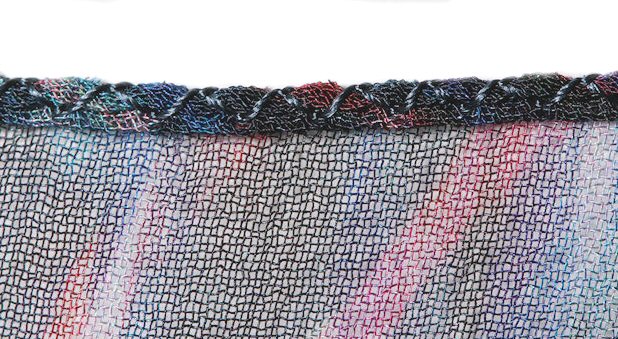
Magnified